
How to Create a Purchase Order, Receive It, and Convert It to a Vendor Bill
This workflow ties together the three stages of buying inventory from a vendor. First you raise a purchase order, which records what you intend to buy, from whom, and at what price. When the shipment arrives you receive the order, which updates inventory on-hand, records item cost history, and posts the inventory and accrual journal entries. Finally you convert the receipt into a vendor bill, which is the payable that flows into the check-writing and aging process. Each stage hands off cleanly to the next, so you do not have to re-key the order details.
Requirements
Depending on what you record, this workflow can use the Requested Ship Date, Item Identifiers & Tracking (Serial Numbers), Cost Codes For AR/AP, and Special Check Size With GL On Stub features.
Step 1: Create the Purchase Order
Where: Expenses -> Purchase Orders -> New Purchase Order
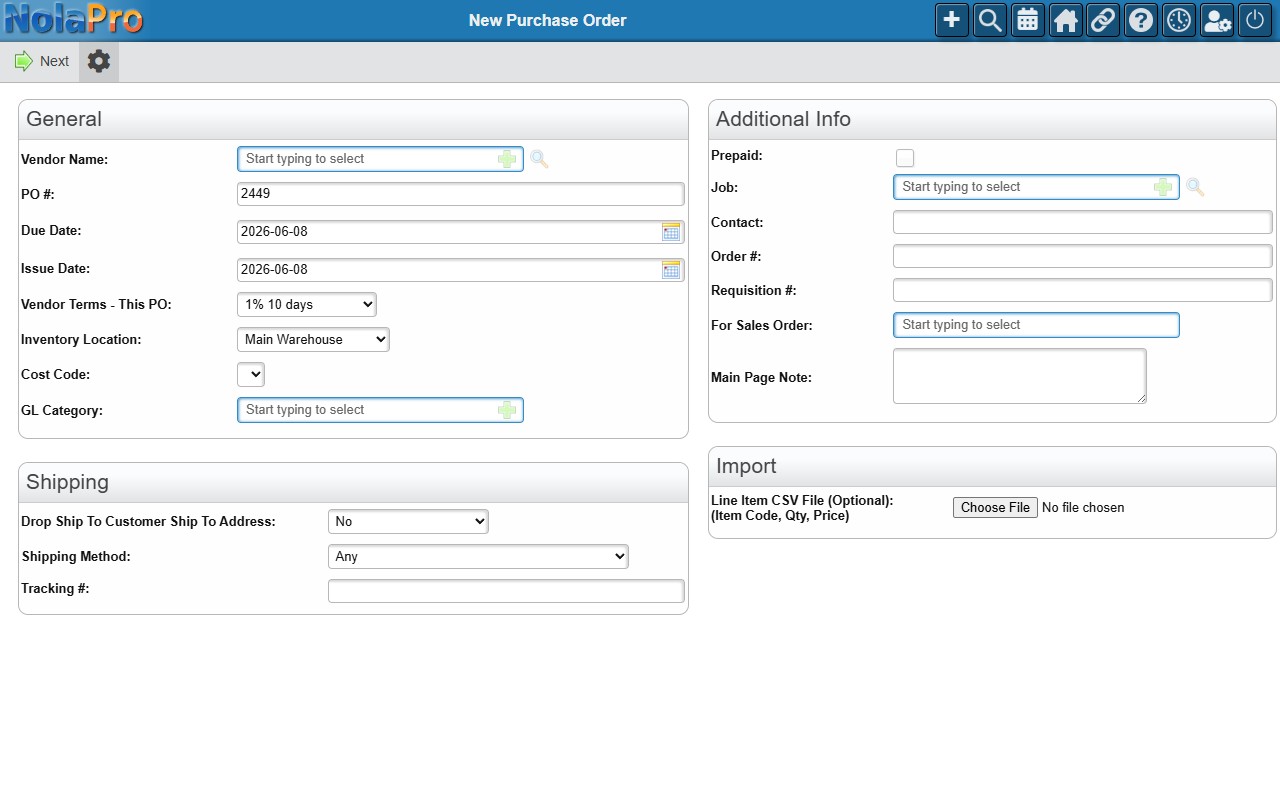
1) On the header step, choose the Vendor Name (required). The terms, shipping method, and due date pre-fill from the vendor.
2) Set the Inventory Location (shown when more than one location exists), and adjust the PO #, Due Date, or Issue Date if needed. Leaving the PO number blank assigns the next number in the sequence.
3) Optionally link a customer order with For Sales Order, set Drop Ship options, or add a Main Page Note.
4) Click Next to move to the line items step.
5) Add each line: pick the Item (which fills in the description, price, and GL account), enter the Quantity (Stock Units), confirm the Price, and adjust the GL Account if needed. Use Add Line Item for more rows.
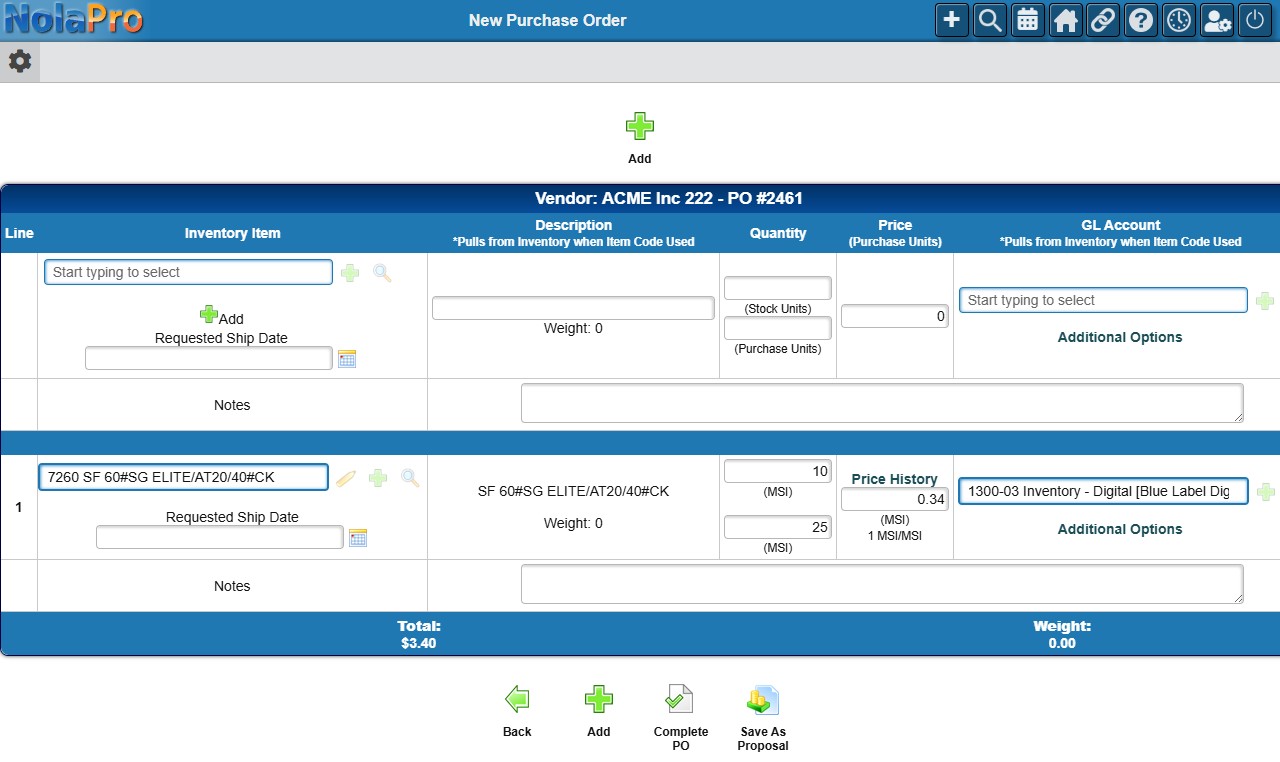
6) Click Complete PO to save the order. After saving, a button is offered to receive against this PO.
Step 2: Receive the Items Against the PO
Where: Expenses -> PO Receipts -> Receive Items on PO
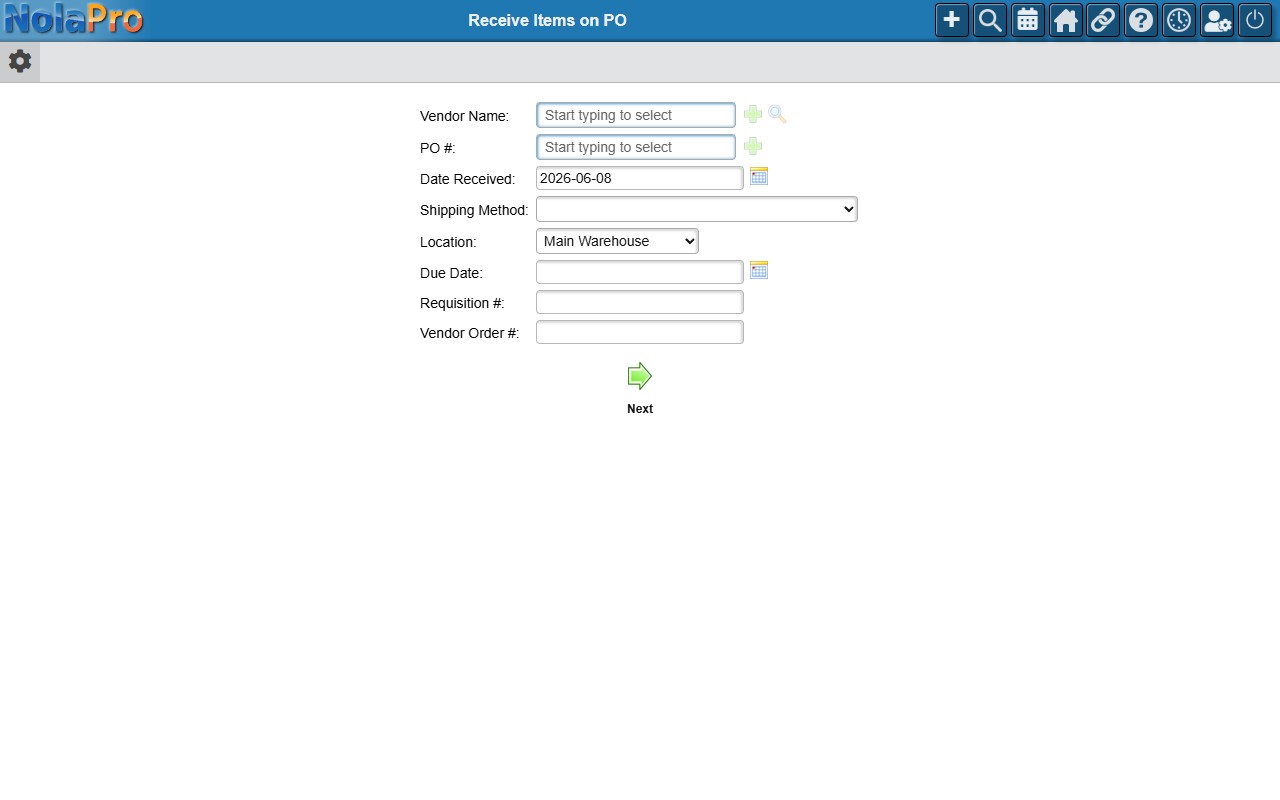
1) Use the search form to find the PO (by Vendor Name, PO #, or other filters). Submit with no filters to list all open POs.
2) On the receive form, every open line is listed. Check the lines you are receiving.
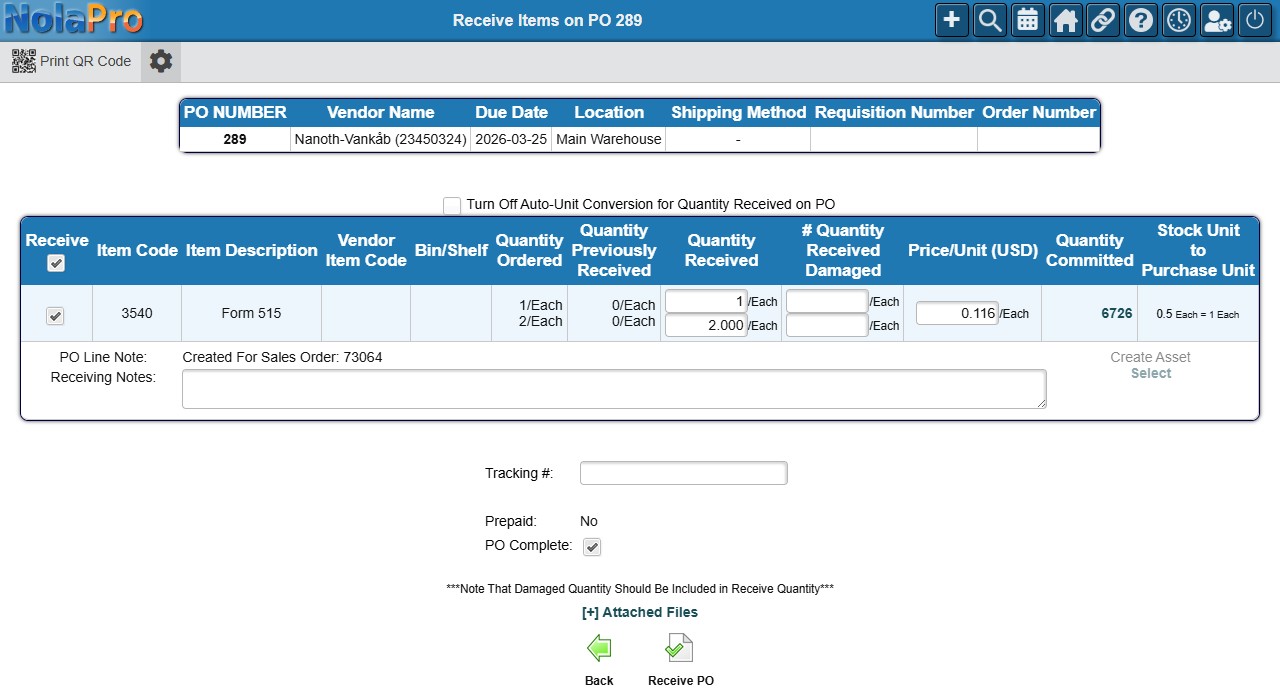
3) Enter the Quantity Received per line (defaults to the remaining undelivered quantity). Record any Damaged Quantity, adjust Unit Cost if editable, and add Line Notes.
4) If serial or lot tracking applies, enter the values in the Item Identifiers table under each line.
5) Enter one or more Tracking # values, and check PO Complete if this receipt closes out the order.
6) Save the receipt. On-hand inventory and cost history update immediately.
7) After a successful receive, the confirmation offers a Pass to AP button; click it to create a vendor bill from the received PO and continue into payables.

Step 3: Convert the Receipt to a Vendor Bill
Where: Expenses -> Vendor Bills -> New Vendor Bill
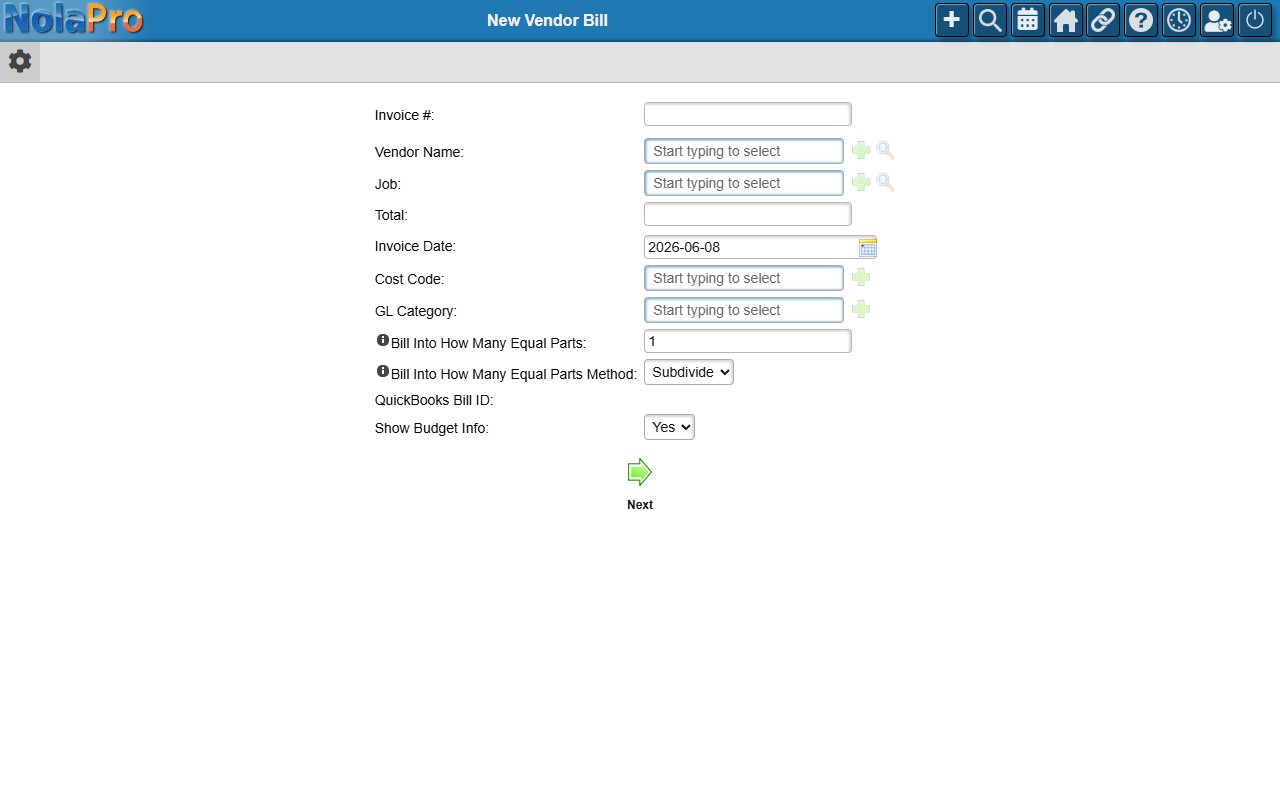
1) On the header, confirm the Vendor Name, enter the Invoice # from the vendor's paperwork, the Total (including any sales tax), and the Invoice Date.
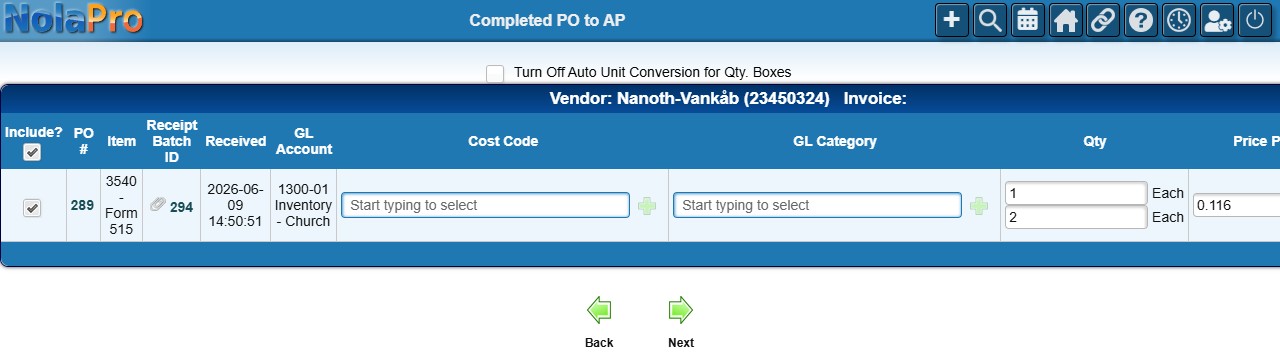
2) Click Next to reach the details and line items page. (If you came in through Pass to AP from a received PO, the next page first lists that PO's received lines with an Include? column so you can pull them onto the bill.)
3) Review the Discount Date, Due Date, and Discount Amount (all calculated from the vendor's payment terms; editable).
4) Distribute the bill across the Amount and GL Account lines so the line totals equal the bill total minus sales tax. The first line typically auto-fills with the remaining amount.
5) Optionally enter Sales Tax rows, a Description, or expand Attached Files to upload the vendor invoice.
6) Click Complete Bill. This button is always available; when you click it the page checks the entry and warns you if the line amounts do not add up to the bill total minus tax, if a line with an amount has no GL Account selected, or if no line has an amount at all. The live Current Total, Needed Total, and Difference figures at the bottom of the grid help you balance the lines before you click.
7) After the bill saves, the confirmation screen offers Back, Edit, and Pay buttons. Edit reopens the new bill so you can change it, and Pay opens the Write Checks screen pre-filled for that vendor and invoice so you can pay it right away.
Reviewing and Reversing Receipts (Items Received report)
Where: Expenses -> Reports -> Items Received
1) Enter a Begin Date and End Date and, optionally, an Item Description or Code, Location, Category or other filters; check Non-PO Only to see only items received without a purchase order. Click Next.
2) Each receipt is listed with the item, quantity (and damaged quantity), amount, PO, location, who entered it and the ledger post date, with links to the item's history, notes and labels.
3) To reverse a receipt that was entered by mistake, use its Cancel action. NolaPro takes the quantity back out of inventory and posts an Item Unreceive journal entry that reverses the original. A receipt whose items have already been sold cannot be unreceived ("Items From This Purchase Already Sold - Cannot Unreceive").
4) For a receipt that recorded damaged items, Create Return PO For Damaged Items starts a return purchase order to the vendor for the damaged quantity.
Notes
- The PO number is assigned from the company sequence at save time when left blank; when configured, the inventory location code is appended automatically.
- When you edit an existing purchase order and change the item on a line, that line's Description and Price Each refresh from the new item. Anything you typed into those fields yourself is kept. A field that still shows the value the item supplied appears slightly faded; once you type in it, it displays normally and is never overwritten. Received lines are not affected. (The New Purchase Order screen in Step 1 does not do this.)
- On receipt, damaged items still count toward the received quantity and update on-hand inventory; the damaged amount is recorded separately for reference.
- Receiving posts a journal entry debiting inventory and crediting accrued purchases; if accrual mode is in use, the unit cost is locked to the PO price during receiving.
- The Complete Bill button is always shown; when you click it the page validates the entry and warns if the line item amounts do not add up to the bill total minus sales tax, if a line with an amount has no GL Account, or if no line has an amount. Live Current Total, Needed Total, and Difference figures show at the bottom of the grid.
- A duplicate invoice number for the same vendor triggers a warning and blocks the save, so each vendor invoice is entered only once.
- If the PO was prepaid by credit card and the prepaid amount does not match the PO total, the PO Complete option on the receive form is replaced with an error message.