How to Add a New Inventory Item End-to-End
Adding an inventory item is a two-step process. First you describe the item itself: its code, description, category, type (stocked, non-stocked, or other charges), default vendor, GL accounts, and any catalog or B2B details. After you save, the system normally presents a second step where you assign the item to an inventory location and set its per-season stocking levels, sell prices per price level, and quantity discounts. Once both steps are complete the item is ready for purchasing and sales. At least one item category must exist before you start; if none do, you will be sent to create a category first.
Requirements
The Inventory & Ordering System feature must be enabled.
Step 1: Describe the New Item
Where: Inventory -> Items -> New Item
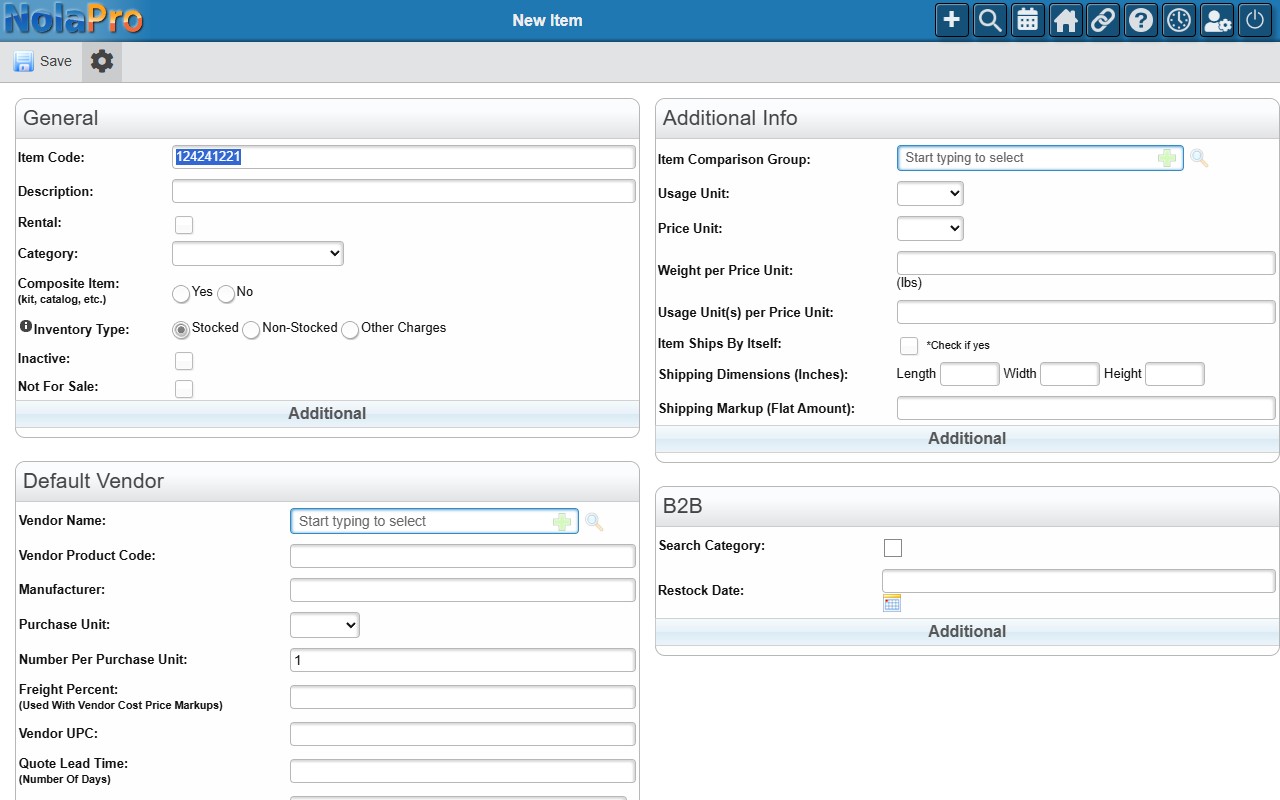
1) In the General section, enter the Item Code and Description, choose a Category, and pick the Inventory Type (Stocked, Non-Stocked, or Other Charges). Mark Composite Item if this item is built from other items.
2) In the Default Vendor section, optionally enter the Vendor Name, Vendor Product Code, Purchase Unit, and the vendor cost tiers (a cost plus the quantity threshold it applies up to).
3) In the General Ledger section, confirm or override the GL Inventory Account, GL Sales Account, and GL COGS Account. These default to the company's configured accounts.
4) Use the Additional Info, Extras (custom fields), and B2B sections for any remaining details such as units, weights, tax treatment, catalog description, and web-store settings.
5) Click Save to create the item.
Step 2: Set Up Location, Stocking Levels, and Pricing
Where: Item Location Setup (opens automatically after saving Step 1; it is not reached from the menu)
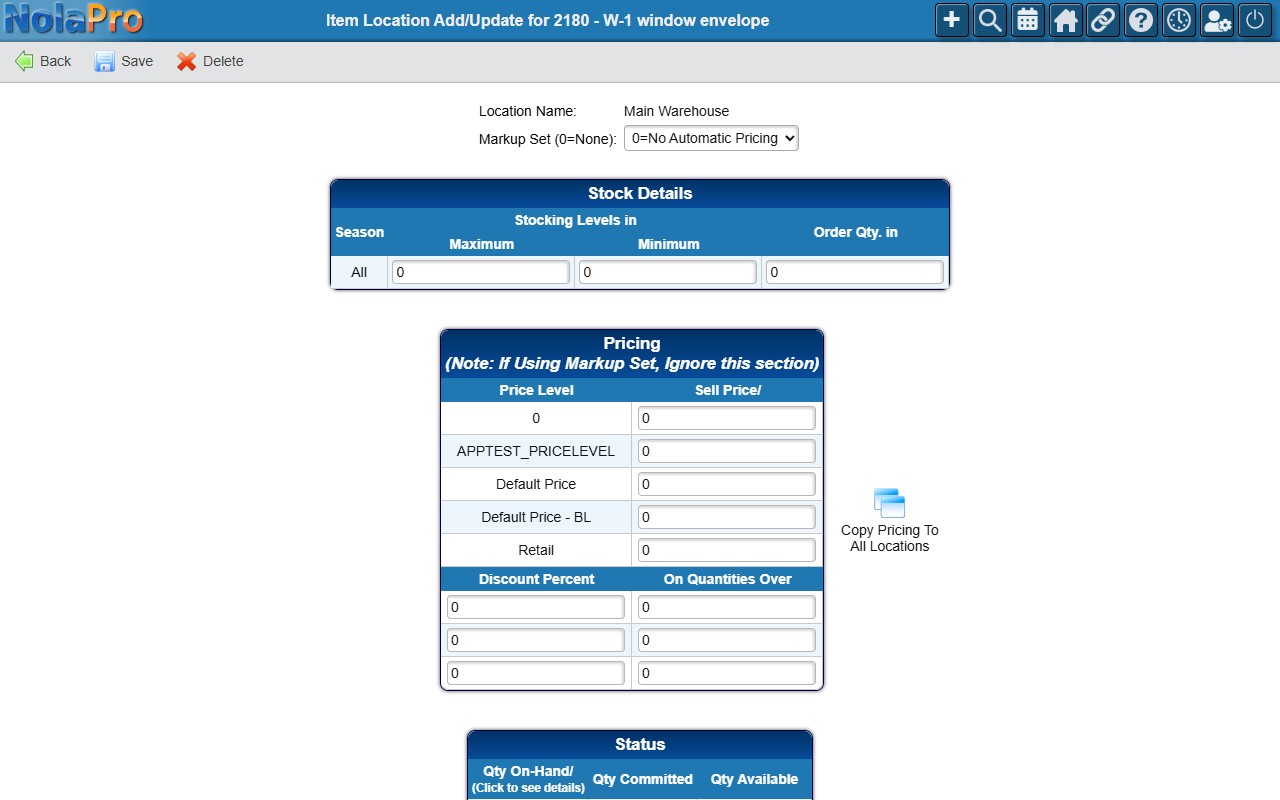
1) If more than one location exists, choose the Location Name, or check Copy Pricing To All Available Locations to apply your entries to every location you can access.
2) Optionally pick a Markup Set to calculate sell prices automatically from cost. Leave it at 0 to enter prices by hand.
3) Enter Maximum Stock Level, Minimum Stock Level, and Order Quantity for each season (or the single "All" row if the category has one season).
4) Enter the Sell Price for each price level. Levels configured as markdowns of another level are calculated automatically and cannot be edited.
5) Optionally add up to three quantity discount tiers, each needing a Discount Percent and the On Quantities Over threshold.
6) Click Save to finish. The system then takes you to the item's setup page for any further configuration.
Notes
- If no item category exists when you open the New Item form, the page redirects you to add a category first.
- Many fields on the New Item form are hidden by your company's field settings; if a field described here is not visible, it may be turned off for your company.
- The Item Code is checked for uniqueness against existing item codes and vendor product codes, and a warning appears on a duplicate. When code editing is locked for stock items, the next code is generated automatically.
- The Vendor Product Code is pre-filled with the Item Code as you type, unless you have already edited it manually.
- The location setup step can be skipped automatically when pricing is supplied through AI-assisted input; in that case the item and pricing records are created and you go straight to the item detail page.
- If the company requires a price for stock items, you must enter at least one complete price level before the location setup can be saved.
- If you marked the item as a Composite Item, a link to enter its components appears after saving the location setup.
- When only one inventory location exists, the location selector is hidden and that single location is used automatically.