
Manual Payments
You can pay vendors without first entering a bill by using the Manual Payments tool (Expenses -> Checks -> Manual Payments). This one-step process will let you select expense accounts for the payment without requiring you to create a vendor bill first and then, separately, a payment.
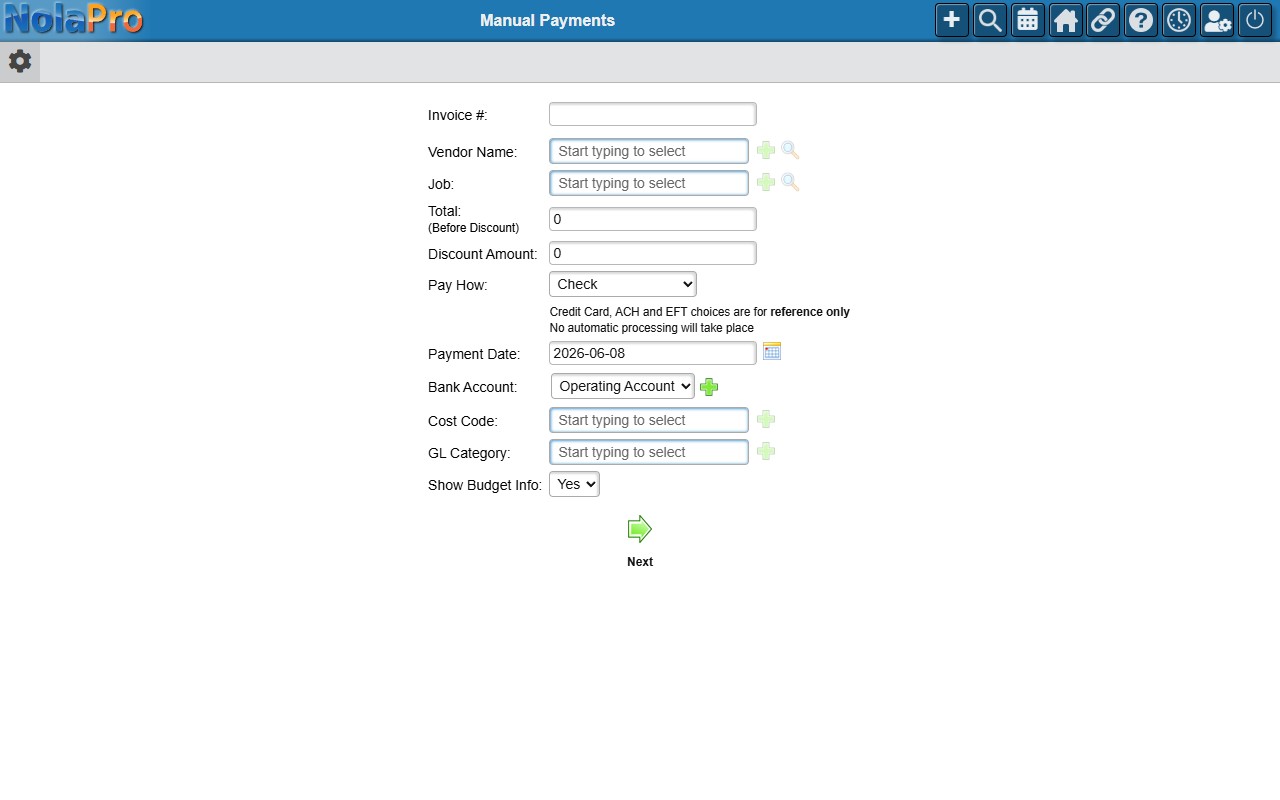
Manual Payments will ask for an Invoice Number, but it is not required to enter one. If you enter an Invoice Number that has already been used, a warning message will appear to let you know the number already exists in the system for the vendor.
When you select a vendor, a Recent Activity section lists the last four invoices entered for that vendor, each showing the invoice number, date, and amount as a link. This makes it easy to match the invoice-number formatting you normally use for that vendor's recurring bills.
On the second page you can enter a Description for the payment. The Description is optional by default, but it becomes required when Require Description on Vendor Bills is enabled in Admin -> Payables -> General Setup.
Once the payment saves, a confirmation summary appears for the entry you just made. It shows the Vendor (linked to the vendor record), the Invoice (linked to the vendor bill), the Description when one was entered, the Date, and the Amount (linked to the check). These links let you jump straight to the vendor, the bill, or the check right after entry, including reaching the check on Expenses -> Checks -> View/Cancel Checks and the vendor bill without navigating the menus manually.
After you have created the Manual Payment entry, you will not be able to make edits. You will first need to void the payment by going to Expenses -> Checks -> View/Cancel Checks, and void the bill by going to Expenses -> Vendor Bills, then you can write another check.