
Customer Page Customizer
The Customer Page Customizer tailors the New Customer and Edit Customer screens to the way your company works: hide the fields nobody uses, make the fields your staff must always fill in required, and pre-fill a default value for new customers. Each company keeps its own settings, and a change applies the next time anyone opens the customer screens.
Requirements
The Customer Page Customizer add-on and Setup rights for the Billing module (or the page granted under Advanced User Rights).
Customizing the customer screens
Where: Admin -> Billing -> Customer Page Customizer
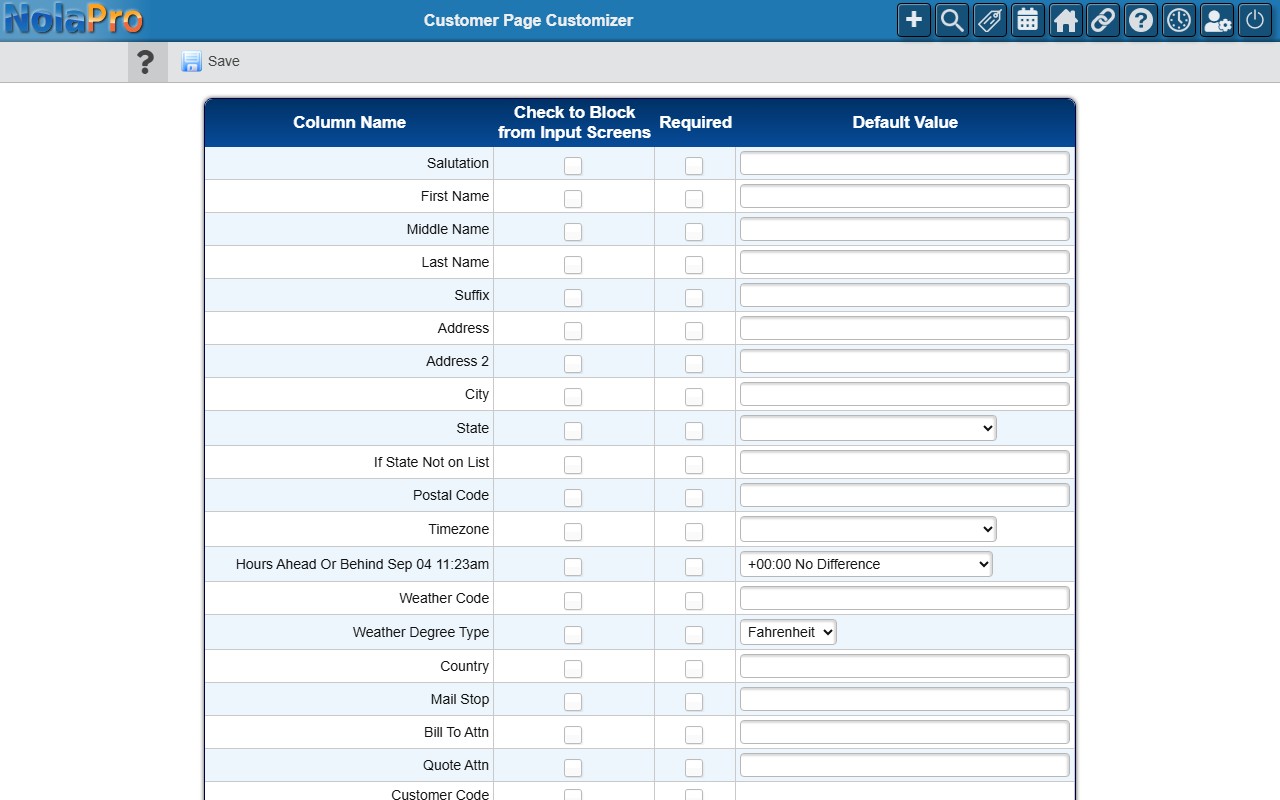
1) The page lists the fields of the customer record, in the order they appear on the customer screens, in a table with the columns Column Name, Check to Block from Input Screens, Required and Default Value. The list runs from the contact name and address through phones, email addresses and their send options, notification preferences, credit settings, sales defaults, terms and the various order and delivery flags.
2) Tick Check to Block from Input Screens to hide a field from the New Customer and Edit Customer screens, or Required to make it mandatory before a customer can be saved. A field is one or the other, not both.
3) Enter or choose a Default Value to pre-fill the field on every new customer. The control matches the field: a text box, a dropdown for fields such as State, Timezone, Preferred Payment Method, Salesperson or Sales Category, a checkbox for yes/no flags, and a start-typing lookup box for Customer Group, Sales GL Account and Invoice Terms. For a yes/no flag, leaving the default box unticked saves the default as off, even for flags that are normally on (such as Require Statement or the email send options). The Rental Billing default is a dropdown with Company Default, In Advance and In Arrears. A default for Invoice Terms is also saved as the company's default invoice terms.
4) Fields that the customer screens cannot hide show Cannot Block in place of the checkbox (for example Invoice Terms, because every customer needs terms); they can still be made required or given a default. Internal fields are not listed at all.
5) The last row, Ship To County, controls the county box on ship-to addresses and inventory locations. Tick Check to Block from Input Screens to hide it, or Required to make it mandatory. Until the page has been saved once, the county box is shown.
6) Click Save. All rows are saved together; the page shows "Saved" and redisplays the table (a "Query Error" message means the save did not complete). When the page was opened from another screen a Close Window button appears beside Save.
7) Open New Customer to check the result: a blocked field is simply gone from the form, a defaulted field starts with your value, and a required field is checked when you click Save. If a required field is empty a message "Please Complete Required Field" names the field, the cursor moves to it, and the customer is not saved until it is filled in.
Notes
- Start small: block one or two fields, open the customer screen to check the result, then come back for the rest.
- If the contact's first and last name are missing from your customer screen, they have been blocked here; see Customer First/Last Name Not Appearing on Customer Page.
- Blocking a field only hides it from the customer screens; the values already stored in it are kept when the customer is saved.
- Default Sales Location can be blocked like any other field. If it is missing from your customer screens after saving this page on an earlier version, untick its block box here and save to bring it back.
- Field visibility, required status and defaults (including the Ship To County setting) are kept per company, so a multi-company install can show different customer fields in each company.
- Required fields are enforced on the New and Edit Customer screens only; imports, the API and integrations are not affected.
- The vendor and item screens have their own customizers; see Vendor Page Customizer and Item Page Customizer.