Quick Start
This quick start covers the essentials: create your first project, break it into milestones, add tasks, and track everything to completion from the dashboard. Once you are comfortable with these steps, the other articles explain each feature in full.
The flow is four steps; after the first, you stay on the Home tab:
- Create a project — the container for your work.
- Add milestones — the project's major phases, added from the Home tab with Add Milestone.
- Add tasks — the individual pieces of work, added from the Home tab with Add Task.
- Track and complete — mark tasks done from the dashboard and watch progress update.
Tip: Open the Home tab and select a project — the taskbar then shows Add Milestone and Add Task buttons that pop up right on the dashboard, project pre-filled.
Step 1 — Create a Project
Path: Projects -> Projects → Add
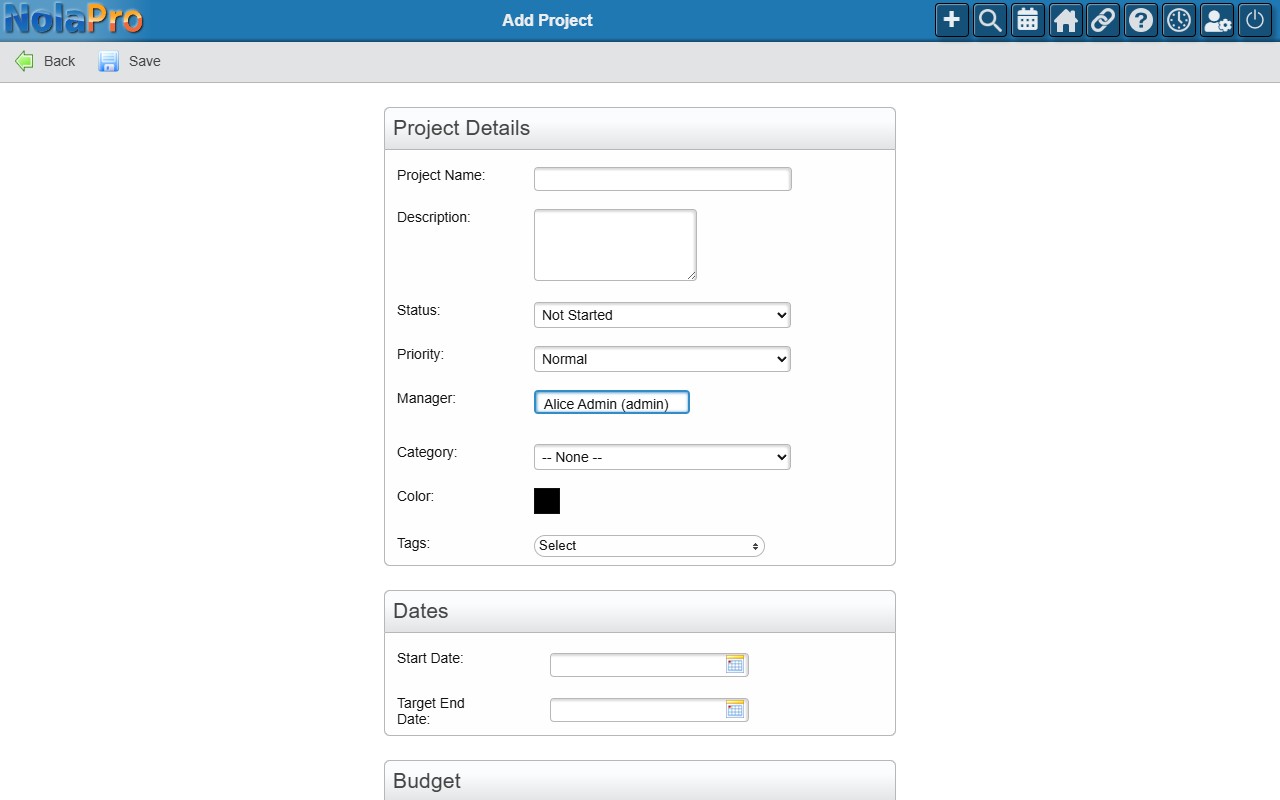
- Go to Projects -> Projects and click Add in the taskbar.
- Enter a Project Name — this is the only required field.
- Optionally set a Start Date and Target End Date so the project shows up correctly on the dashboard and timeline.
- Leave everything else at its defaults for now (Status defaults to "Not Started", Priority to "Normal", and you are set as the Manager).
- Click Save.
NolaPro automatically assigns a project code (e.g. TPM-001) and adds you as the project manager.
Step 2 — Add Milestones
Path: Home → select your project → Add Milestone (taskbar)
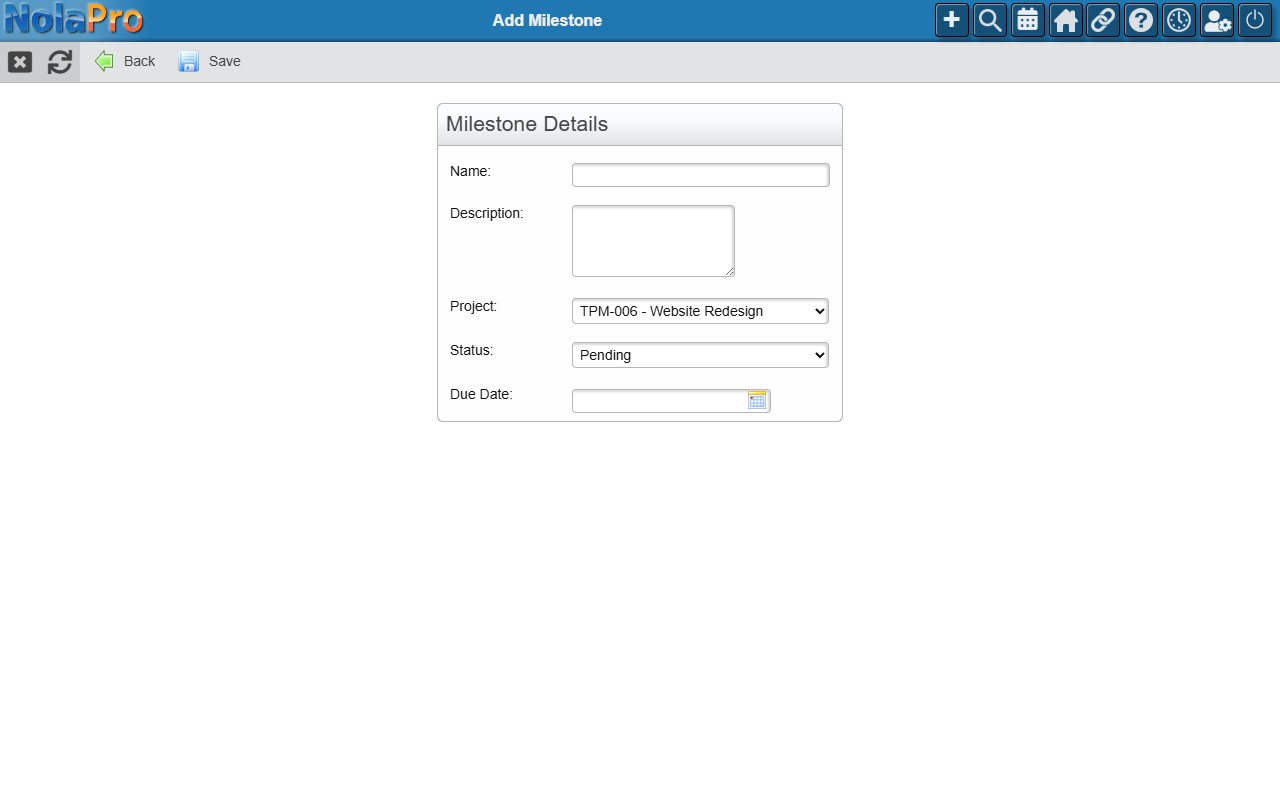
Milestones are the major phases or checkpoints of a project (for example "Planning", "Build", and "Launch"). Tasks are grouped under them so you can track progress phase by phase.
- Open the Home tab and click your new project in the left sidebar. This loads its dashboard and activates the project's action buttons in the taskbar.
- Click Add Milestone in the taskbar. A small window opens right on top of the dashboard — the page does not reload, and your Project is already filled in.
- Enter a Name for the milestone.
- Optionally set a Due Date.
- Click Save. The window closes and the new milestone appears on the dashboard.
Repeat for each major phase of your project. You do not need many — two or three is plenty to get started.
Step 3 — Add Tasks
Path: Home → select your project → Add Task (taskbar)
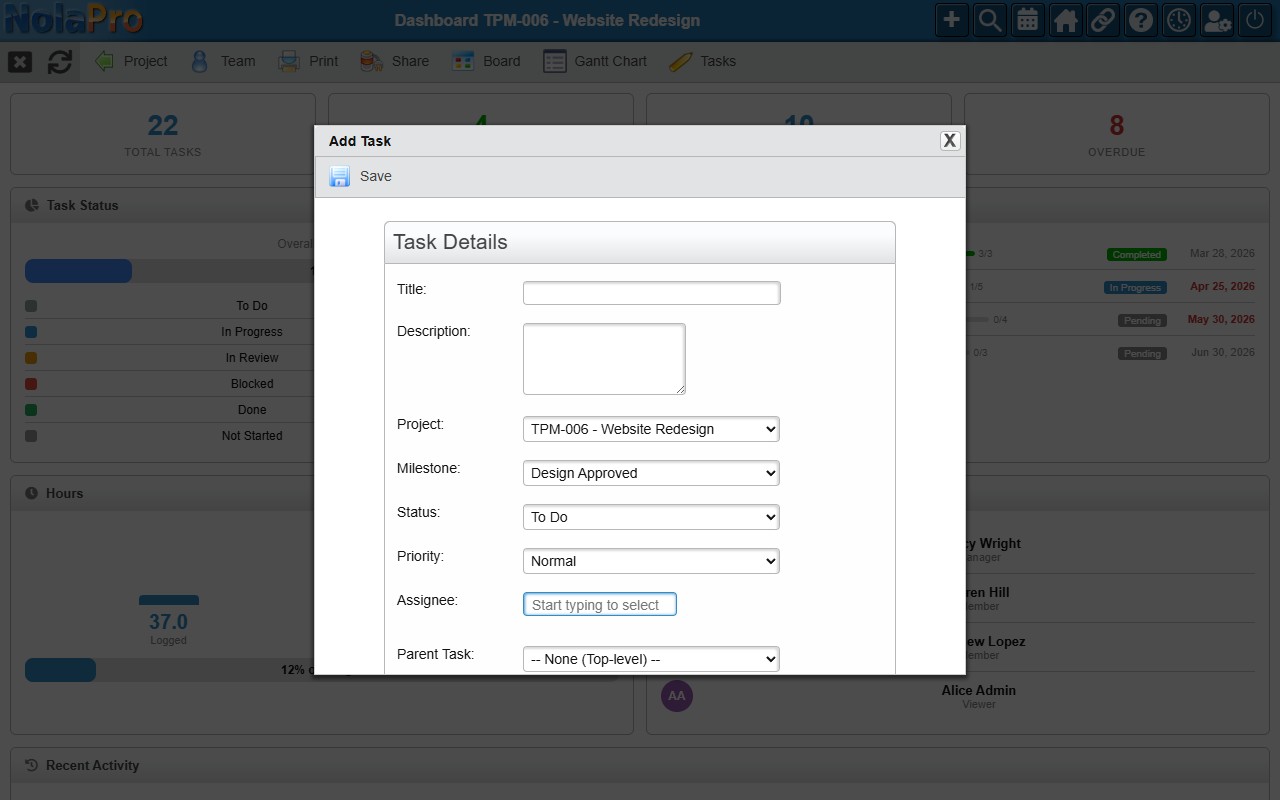
Tasks are the actual pieces of work your team will do. With your project still selected on the Home tab, you can add them without leaving the page.
- Stay on the Home tab with your project selected in the sidebar.
- Click Add Task in the taskbar. A small window opens on top of the dashboard — the Project is already filled in.
- Enter a Title.
- Choose the Milestone this task belongs to. The milestones you created in Step 2 are in the dropdown.
- Optionally pick an Assignee (start typing a user's name) and a Due Date.
- Click Save. The task appears under its milestone on the dashboard.
Tip: To drop a task straight into a specific milestone, scroll to the task list at the bottom of the dashboard and click the small + (Add Task) icon on that milestone's header row.
Step 4 — Track and Complete from the Dashboard
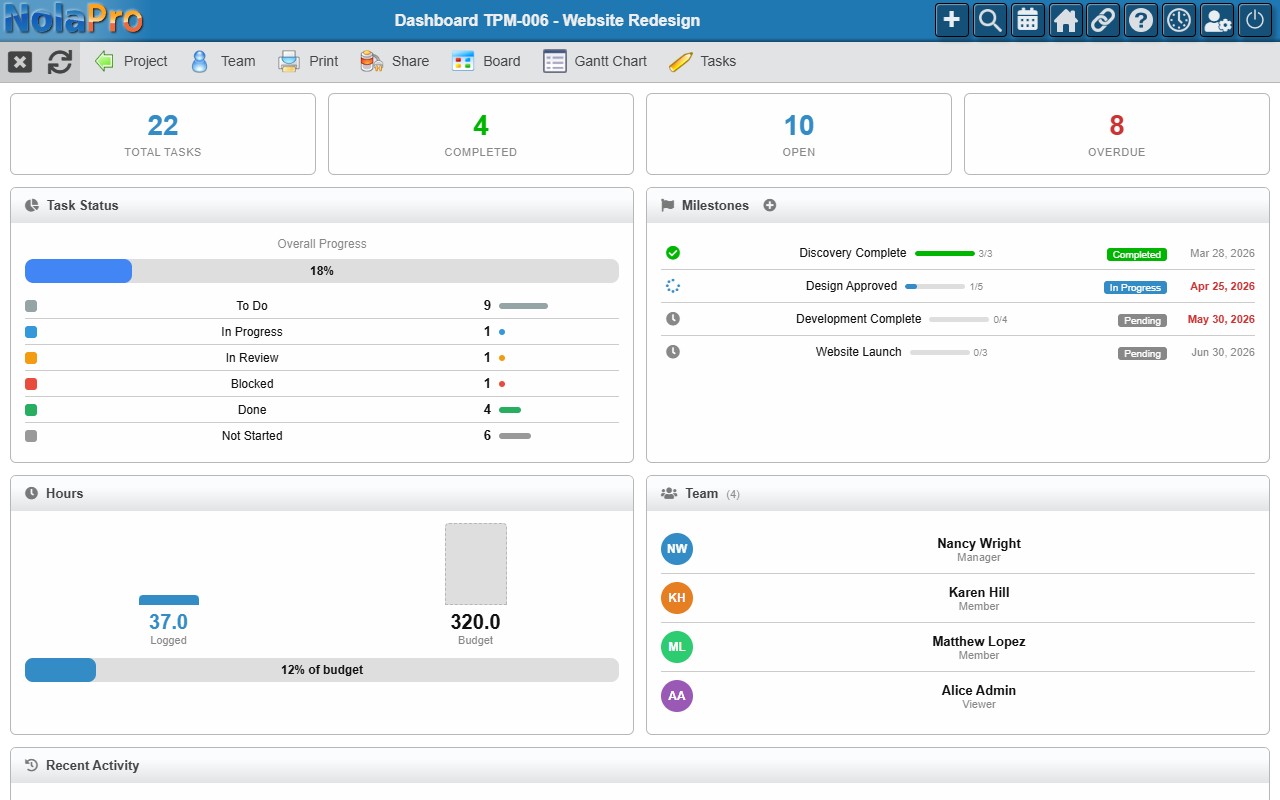
You stay on the same project dashboard to track everything. From here you can see overall progress and mark work complete without opening each task individually.
Mark a task complete:
- In the task list at the bottom of the dashboard, find the task (tasks are grouped under their milestones).
- Click the Status value on the task row — a dropdown appears right in place.
- Choose your "done" status (the Done status is set up for you by default).
- The change saves immediately. The Completed count and progress bars at the top of the dashboard update automatically.
Milestones complete themselves: When every task under a milestone reaches a complete status, the milestone automatically flips to Completed — you do not have to mark it done by hand.