
Email Templates
The Mail Templates feature allows you to create email templates for invoices, orders, quotes, statements and purchase orders. The feature is located in Admin -> System -> Mail Templates. The templates can be used when emailing a specific invoice, quote, order, statement, or purchase order to a customer or vendor.
Variable fields can be inserted for things like customer name, balance, and due date.
You can also create General Customer Message or General Vendor Message email templates which will be available to use when clicking the Email button when viewing a specific customer or vendor. You can then select a template on the Email Center page, and the fields will be filled in with values from the customer's or vendor's account.
Formatting a Template
The template Body is a rich-text editor, so you can format the message much like in a word processor. Open the template in Admin -> System -> Mail Templates (select it and click Edit, or click Add for a new one), select the text you want to change, then click a toolbar button or choose from a toolbar list.
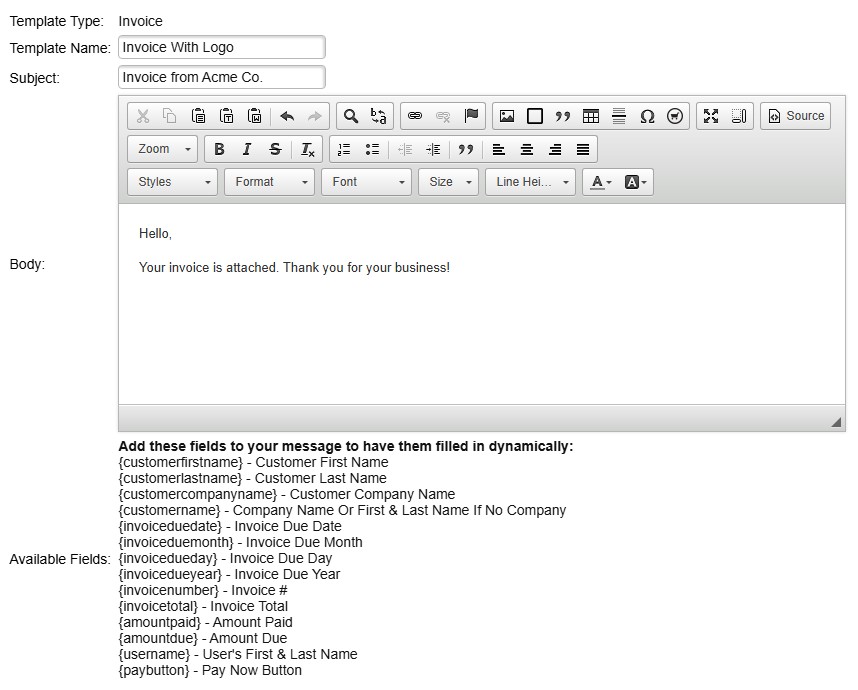
The editor toolbar includes:
- Bold, Italic and Strikethrough, plus Remove Format to clear formatting from the selected text.
- The Font and Size lists to change the typeface and text size, and the Text Color and Background Color buttons.
- The Styles and Format lists for preset styles and headings.
- Numbered and bulleted lists, Decrease Indent and Increase Indent, Block Quote, and left, center, right or justified alignment.
- Link and Unlink to add or remove a web link on the selected text, Table, Horizontal Line, and Special Character for symbols such as © or €.
- Undo and Redo, Find and Replace, and Paste as plain text or Paste from Word to bring in copied text without stray formatting.
- Maximize to enlarge the editor while you work, and Source for advanced users to edit the template's HTML directly.
Adding an Image
A template can include images, such as your logo at the top of every invoice email. The editor inserts an image by its web address: the picture stays on a website, and the recipient's email program loads it from there when the message is opened. The image must be at a public address that starts with https:// and ends in the image file itself (.png, .jpg or .gif), for example a logo on your company website.
1) Open the template in Admin -> System -> Mail Templates (select it and click Edit, or click Add for a new one).
2) In the Body, click where the image should appear, then click the Image button (the picture icon) on the editor toolbar.
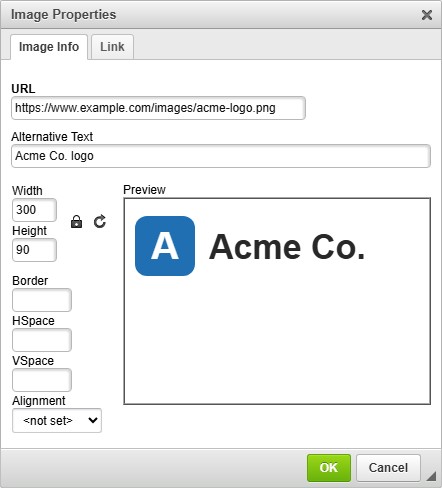
3) On the Image Info tab, paste the image's address into URL (a preview appears when it is correct) and enter Alternative Text, such as your company name, which recipients see when their email program blocks images.
4) Optionally set the Width and Height (they stay in proportion) and the Alignment. To make the image clickable, enter a web address on the Link tab.
5) Click OK, then Save the template. Email a document of that type to yourself with the template to confirm the image displays. To change the image later, double-click it.
- There is no option to upload an image file from your computer in the editor, and images pasted from another program may not display for recipients. Insert images by web address.
- NolaPro does not store a copy of the image. If the file is moved or deleted from its web address, it stops showing, including in emails already sent.
- Many email programs hide images until the recipient allows them, so keep important information (amounts, due dates) in the text, not only in the image.
- Each template has its own body, so add the image to every template that should show it.