
Internal Messaging: Messages, Message Graphics, Categories and Who Has Seen
Internal Messaging lets you post announcements to everyone who uses NolaPro, or send a message to specific NolaPro users, from inside NolaPro. A message appears to each recipient in a Message For You dialog while it is posted. Personal messages ask the reader to confirm they have read them, and you can check at any time who has confirmed. Messages can carry a graphic, and graphics are organized into categories so the right picture is easy to find.
Requirements
The Internal Messaging feature must be enabled. Creating and editing messages, graphics and categories, choosing a graphic in the Select Graphic gallery, and opening the Who Has Seen report require a Company Supervisor login or a user with the Allowed to Create Messages privilege (a user without it sees "Not Authorized" and the privilege name); a non-supervisor also needs the Internal Messaging page granted under Advanced User Rights.
Sending a message
Where: Admin -> System -> Internal Messaging
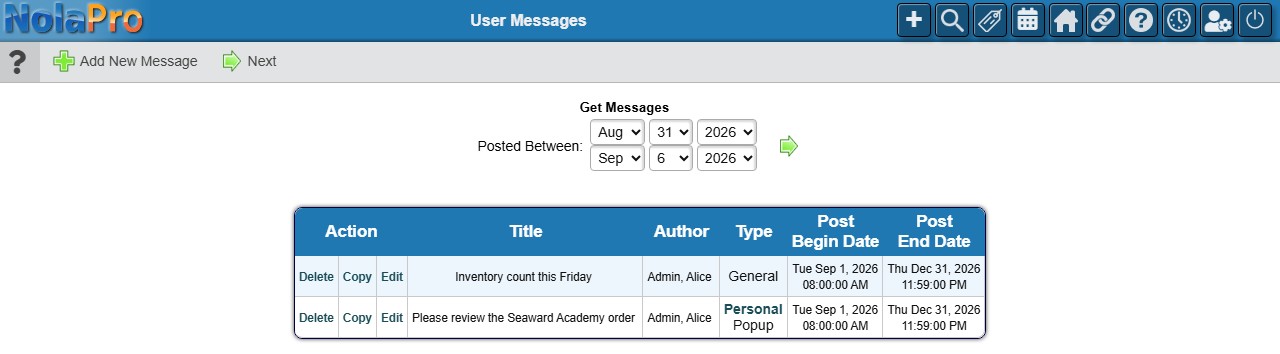
1) The Get Messages list shows the messages whose posting start date falls in the selected range; the Posted Between dates default to the current week. Change them and click the arrow (or Next) beside them to see other messages. Each row shows the title, author, type (Personal messages also say Popup) and posting dates, with Edit, Copy (start a new message from this one; the copy only exists once you save it) and Delete actions. Messages from every company on the install are listed together.
2) Click Add New Message.
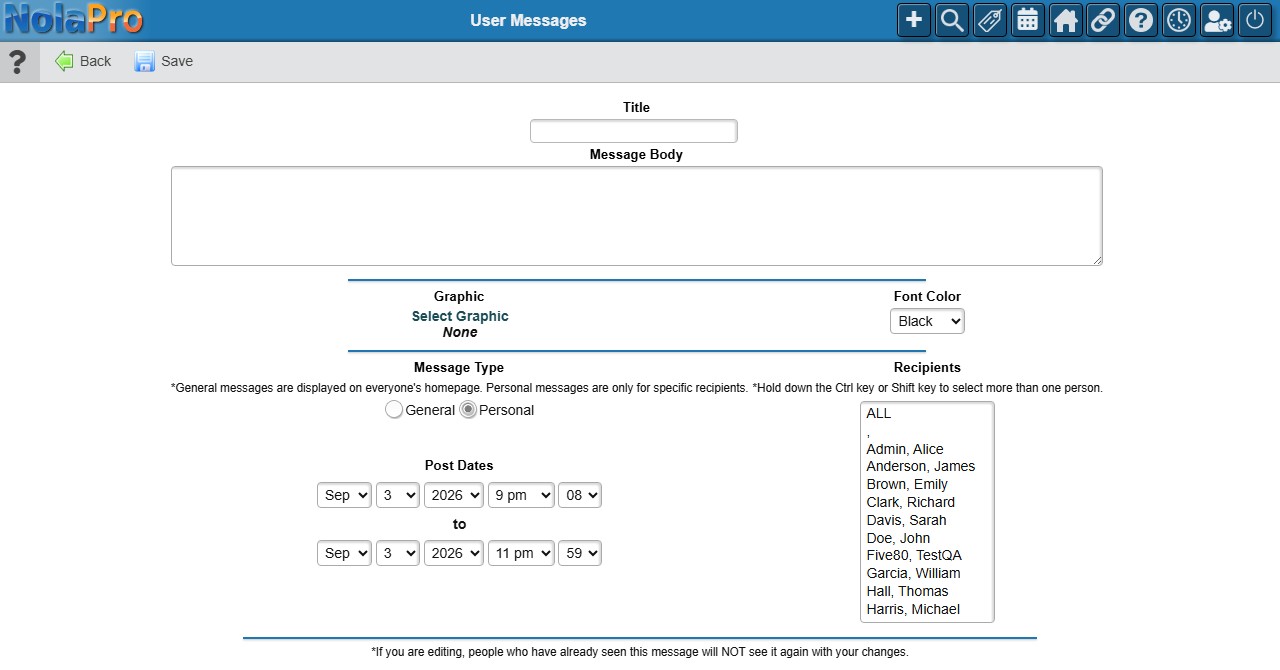
3) Enter the Title (shown as the heading of the message) and the Message Body. Pick a Font Color (Black, Red, Green, Blue, Orange or Purple) if you want the message to stand out, and click Select Graphic to add a picture from the Message Graphics gallery. The gallery lists the graphics of every company you have access to. To remove a graphic from the message, open Select Graphic again and click None.
4) Choose the Message Type. Personal is selected by default and enables the Recipients list, where you select one or more of the current company's users (use Ctrl or Shift to select several); ALL sends it to every active user in every company. General shows the message to every user who logs in to NolaPro, in any company. If you save a Personal message without selecting any recipients, NolaPro shows Required: Recipients: click Cancel to go back and pick recipients, or General to save it as a general message instead.
5) Set the Post Dates: the start and end date and time. New messages default to starting now and ending at 11:59 PM today. The message is only shown between these two times.
6) Click Save.
What recipients see
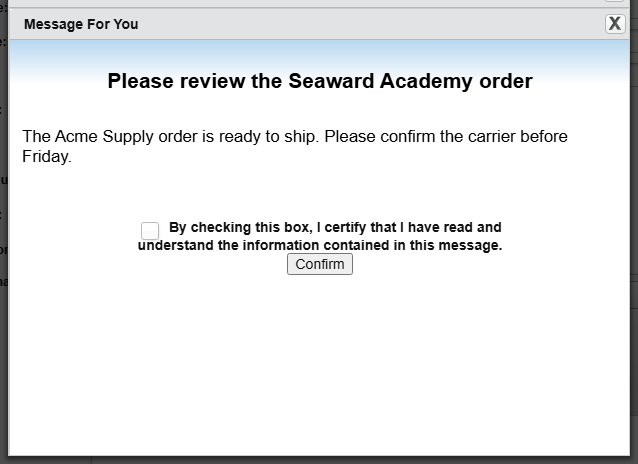
While a message is inside its posting window, each recipient sees a Message For You dialog, and NolaPro checks for new messages about every two minutes while they work (the check runs when they open or change a page). The dialog shows the title, the graphic and the text; a long message scrolls inside the dialog.
1) A personal message includes a checkbox certifying that the reader has read and understood it and a Confirm button. It keeps coming back until the recipient confirms; once confirmed, it stops appearing for that person. Anyone who has not confirmed keeps seeing it until the posting end date passes.
2) A general message is an announcement: it has no confirmation and is shown once per login. Readers simply close the dialog; the next time they log in during the posting window they see it again. A general message posted while a user is already logged in appears at the next message check, without logging out.
Checking who has seen a personal message
Where: Admin -> System -> Internal Messaging, then click Personal in the message's Type column (the saved message's edit form also has a Who Has Seen link)
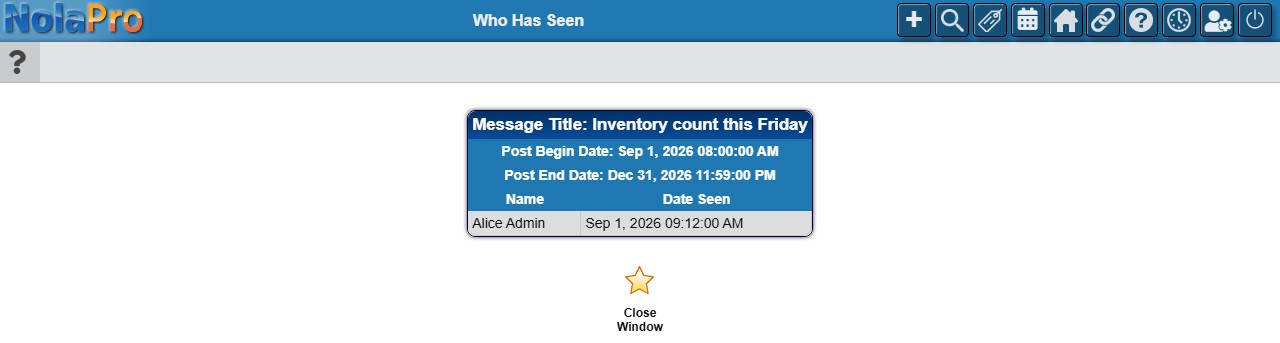
The Who Has Seen window lists every recipient with the date and time they confirmed the message. People who have not confirmed yet show a blank date. Click Close Window when done. General messages have no confirmation, so there is no Who Has Seen report for them.
Message Graphics
Where: Admin -> System -> Message Graphics

1) Click Add to create a graphic entry, or pick an existing graphic from the dropdown (shown with its category in parentheses) and click Edit. At least one message category must exist in the company first; if none does, the page says "You must first create a message category." and offers an Add Category button instead.
2) Enter a short Name, an optional Description, and choose the Category, then click Save. A name that already exists for the company is rejected ("already exists"). You can change the name, description and category later from the edit screen.
3) On the edit screen, use View/Upload/Delete - Message Graphic to attach or replace the picture file. The current picture is shown above the fields once one is uploaded. Delete removes the graphic after "Are you sure you wish to delete this?".
Message Categories
Where: Admin -> System -> Message Categories

1) Click Add, enter the Graphic Category Name and an optional Graphic Category Description, and click Save. Categories only exist to group graphics in the Message Graphics gallery, for example "Reminders" or "Urgent".
2) To rename a category, pick it from the dropdown and click Edit (the edit form labels are Name and Description). Delete hides the category after a confirmation; its graphics are kept.
Notes
- If you edit a personal message that people have already confirmed, they will not see it again. Copy it into a new message instead when everyone should read the change.
- A personal message is only delivered to the selected recipients; a general message is delivered to every user who logs in to NolaPro (in any company) during the posting window. Each user sees a general message once per login, even if they switch companies.
- When you edit a personal message, the Recipients list only shows the current company's users. Recipients who belong to other companies are kept, and a personal message whose recipients are all in other companies stays personal.
- Graphics and categories belong to the company you were working in when you created them, and the Message Graphics and Message Categories pages only show and change that company's entries. The message list itself is shared across companies.