
Add-Ons: Enable, Activate and Find Your Features
NolaPro's optional modules and features are called add-ons. Which add-ons you can use is decided by your license plan: every plan includes a set of add-ons, and the Add-ons screen (its page title still reads Order Add-ons) is where you turn the ones in your plan on or off, see which plan a missing add-on belongs to, and find where each add-on lives in the menu. There is nothing to buy on this screen; to get an add-on that is not in your plan you change plans.
Requirements
The Manage Features tab needs access to the Admin module (or the Add-ons page granted under Advanced User Rights). The Activate Code and Add-On Directory tabs and the license page require a Company Supervisor login; other users may still see the two tabs but get "You are Not Authorized" when they open them. Add-on changes are not allowed on the NolaPro demo site. The screen talks to the NolaPro licensing server, so the install needs internet access; without it a red "Check Internet Connection" message appears and the plan information for missing add-ons is not shown.
Manage Features
Where: Tools -> System -> Add-ons
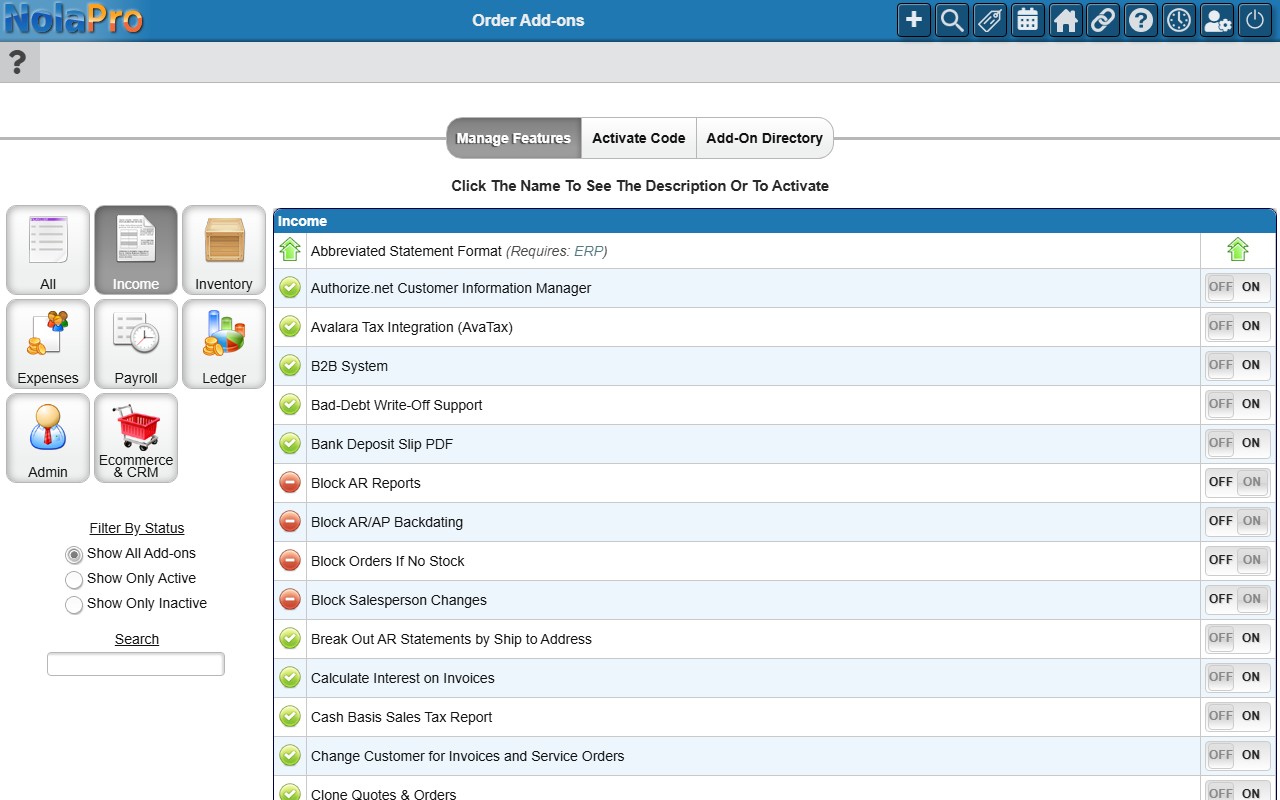
1) The screen opens on the Manage Features tab with the Income area selected, listing the add-ons in your plan (plus any activated by code or subscription) grouped by area (All, Income, Inventory, Expenses, Payroll, Ledger, Admin, Ecommerce & CRM, Misc Add-ons, plus Discount Bundles, Data Allowance and Manuals & Support groups where they apply). Use the icons on the left to show one area at a time (All shows everything), the Search box to narrow the list as you type (two or more letters; the search switches to the All view), and Filter By Status to show all add-ons, only active ones, or only inactive ones. Filtering happens on the screen; the page does not reload. An area whose add-ons are all active shows just its heading under Show Only Inactive.
2) Each add-on has an OFF / ON switch and a matching status icon (green check = active, red = disabled). Click OFF or ON to change it. The status icon turns into a spinner while the change is saved in the background, which can take a few seconds; there is no save button. When it finishes the icon and the row's status update; the row stays in the list you are looking at until you change the status filter again. If the save fails the icon changes to a question mark marked "Unknown" and you should reload the page and try again.
3) Click an add-on's name to open a window with its description (nothing happens for add-ons that have none); click the X or anywhere outside the window to close it.
4) An add-on that is not part of your plan shows a green upgrade arrow instead of a switch, and its name is followed by Requires: and the plan (or plans) that include it. Click the plan name to go to the NolaPro License Change page. That page needs a Company Supervisor login ("You Must Be A Supervisor To Access This Page" otherwise).
Changing your license plan
Where: Admin -> System -> NolaPro License, then Change
1) The license page shows your current plan. Change appears when more than one plan is offered; click it to see the available plans and what each one includes (Compare opens the pricing comparison). Plans below your current number of users, items, employees or companies are greyed out with a note saying why.
2) Choose a plan and save ("Saved"). NolaPro contacts the licensing server (the install needs internet access), and the add-ons for the new plan become available on the Manage Features tab. A plan change can also remove add-ons that the new plan does not include.
Activate Code
Where: Tools -> System -> Add-ons, Activate Code tab (Company Supervisor; the page is titled Activate Add-ons)
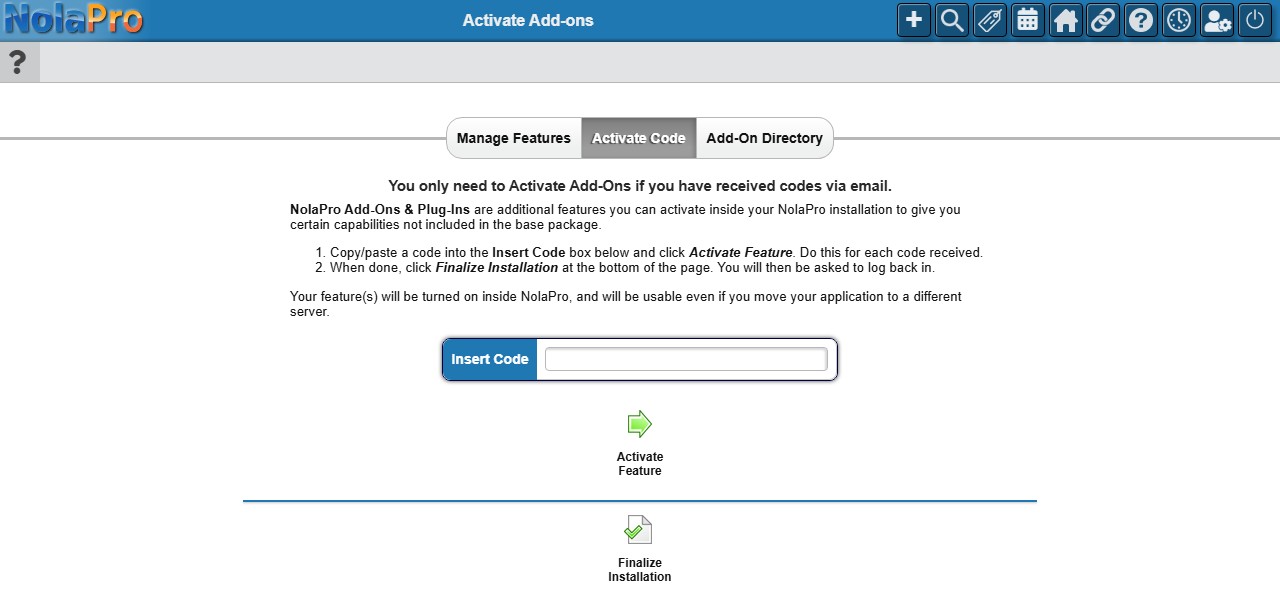
This tab is only needed if NolaPro support has sent you an activation code by email. Add-ons that are part of your plan never need a code.
1) Paste the code into Insert Code and click Activate Feature. The code is checked with the NolaPro server, so the install needs internet access; an error is shown if the code is not accepted.
2) Repeat for each code you received, then click Finalize Installation. This rebuilds the menu with the new features and refreshes your login automatically before returning you to the main page (the on-screen text still says you will be asked to log back in).
Add-On Directory
Where: Tools -> System -> Add-ons, Add-On Directory tab (Company Supervisor)
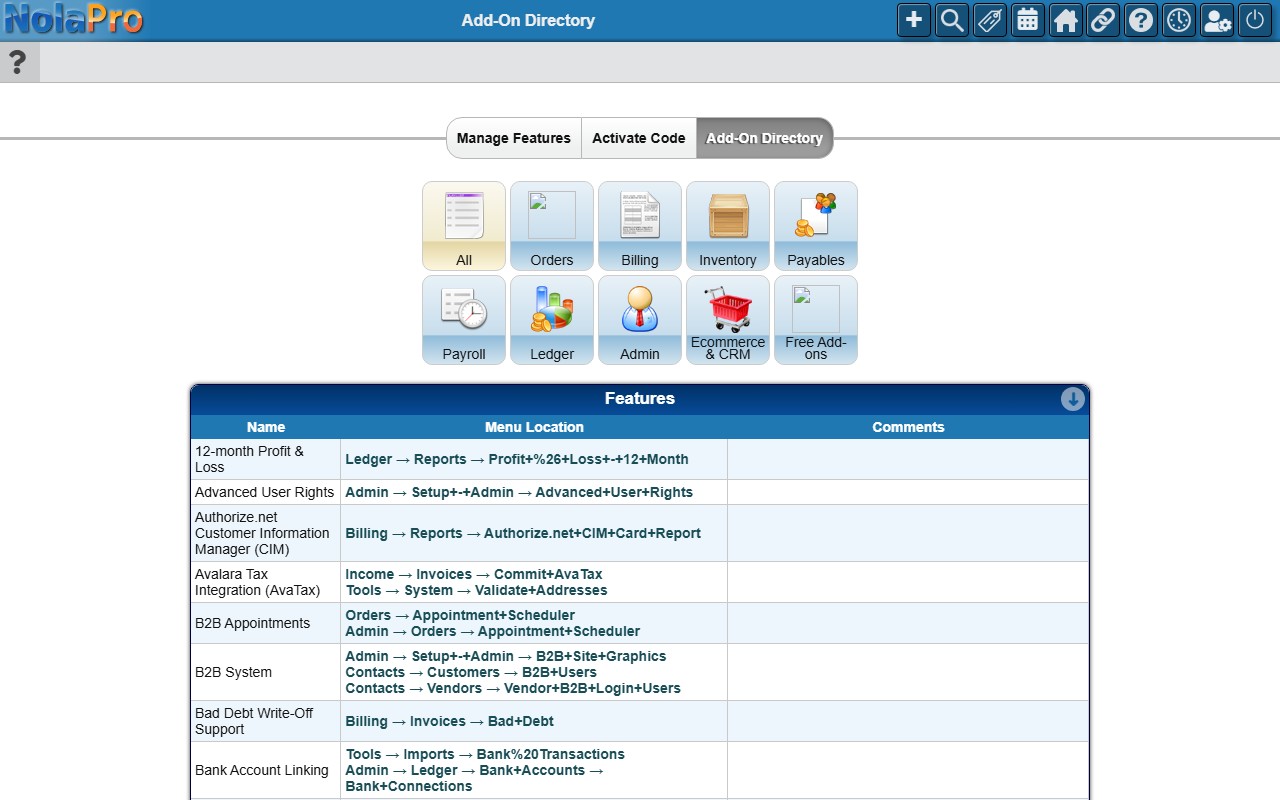
The directory is a catalog of the add-ons (the table is headed Features) with the menu location(s) where each one is used, so you can find where a newly enabled feature shows up. Add-ons with neither a menu location nor a comment are left out.
1) Scroll or use your browser's find to locate an add-on; the table lists them alphabetically.
2) Each menu location is a link that opens that page (locations you do not have rights to are shown as plain text). Add-ons used in five or more places show the first three locations with a Show More link.
3) The Comments column gives usage tips for an add-on where they exist.
Notes
- Turning an add-on off hides its menu items and pages. The data it created is kept, and turning it back on restores access.
- Menu changes from a switch can take up to a minute to appear; logging out and back in shows them immediately.
- Inventory & Ordering System cannot be turned off from this screen once it is active, because other modules depend on it.
- Usage allowances such as extra user seats are handled on the license page, not here.
- Hosted (cloud) installs cannot activate some code-based add-ons; the Activate Code tab reports this if it applies.
- If you have typed a search and then change the status filter, clear the search box and type it again so all matches line up on screen.